
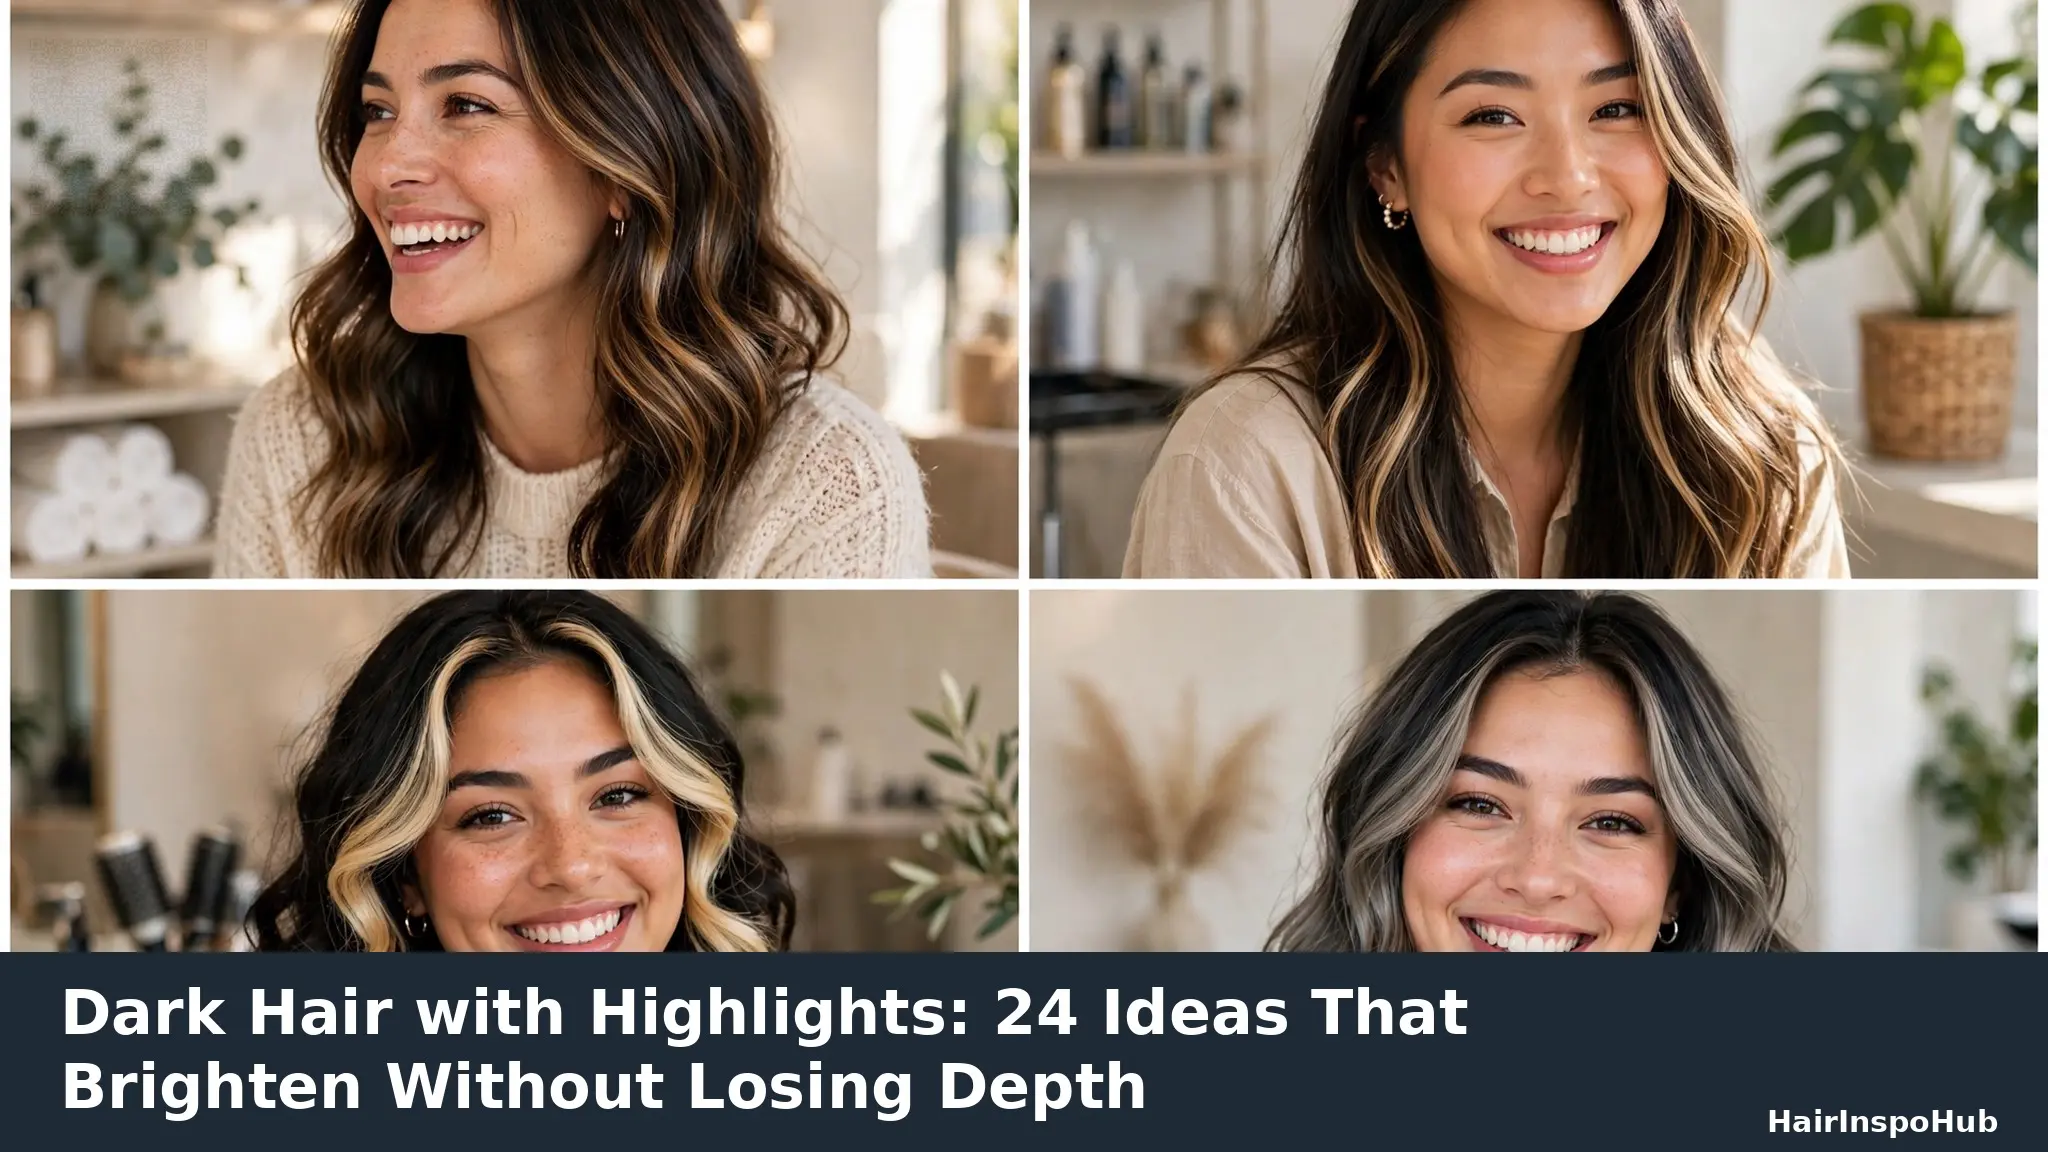
Dark Hair with Highlights: 24 Ideas That Brighten Without Losing Depth

Dark hair has one big advantage and one big frustration. The advantage is depth: a rich brunette or near-black base makes lighter pieces look brighter by contrast, so a little highlighting goes a long way. The frustration is the opposite side of the same coin — done badly, highlights on dark hair can turn orange, look stripy, or need a salon visit every month to stay presentable.
This guide solves the choosing part. Below are 24 highlight ideas for dark brown and black hair, grouped by tone family and technique, each with who it suits, the exact words to say in the salon, and an honest upkeep level. You will also find the one decision that matters more than the photo you bring — how many shades lighter than your base you go — and a maintenance clock so you know what you are signing up for before any bleach touches your hair.
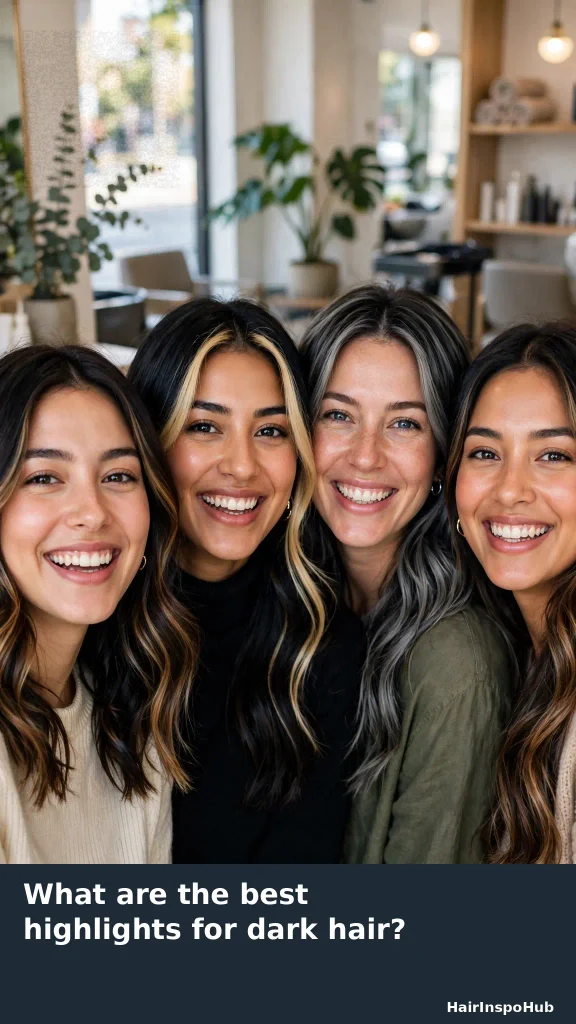
Quick answer: what are the best highlights for dark hair?
For most people with dark hair, the best highlights are balayage or teasylights in a tone one to three shades lighter than your natural base, concentrated through the mid-lengths and around the face, with the root left dark. Caramel and honey suit warm skin, chestnut and toffee suit neutral skin, and mushroom, ash and icy beige suit cool skin. This combination brightens the face, keeps the depth that makes dark hair look expensive, and grows out softly for 12 to 16 weeks instead of showing a hard line at week four.
If you want the single lowest-maintenance option, choose a face-framing money piece plus a few partial highlights on top. If you want the brightest result, choose full foil highlights — and accept a touch-up every 8 to 10 weeks. Everything in this guide is a variation on those two ends.
Highlight ideas at a glance
Use this table to shortlist two or three ideas, then read their full entries below before you book.
| What you want | Best technique | Best tone families | Salon visits a year |
| Brightness you can see in photos | Full foil highlights or foilayage | Honey, blonde, icy beige | 5–6 |
| Soft, sun-kissed, low-maintenance | Balayage or teasylights | Caramel, chestnut, toffee | 3–4 |
| Subtle “is that her natural hair?” | Babylights, partial highlights | 1–2 shades lighter than base | 3–4 |
| Big change without dyeing everything | Money piece + partial highlights | Blonde, caramel, copper | 4–5 |
| Warmth and glow | Balayage ribbons | Copper, cinnamon, cherry cola | 3–4 |
| Cool, smoky, modern | Foilayage with ash toner | Mushroom, ash, smoky grey | 4–5 |
| Fun colour, mostly hidden at work | Peekaboo highlights | Copper, red, violet, blonde | 3–4 |
| Grey blending, not full coverage | Babylights + gloss | Ash, beige, mushroom | 4–6 glosses |
The decision that matters most: how many shades lighter?
Every highlight result is controlled by one number: the gap between your base and your lightest piece. Colorists call this levels. You do not need to learn the whole level system, but you do need this rule, because it predicts brightness, damage and upkeep better than any inspiration photo.
| Shade gap | How it looks | Bleach needed? | Upkeep and risk |
| 1–2 shades lighter | Subtle dimension, “expensive brunette” | Often none or very gentle lift | Lowest upkeep; grows out invisibly; safe first step |
| 3–4 shades lighter | Clearly visible brightness, most requested | Yes, one lightening session | Moderate; gloss every 4–6 weeks stops brassiness |
| 5+ shades lighter | High contrast, blonde-against-dark drama | Yes, sometimes 2 sessions on black hair | Highest upkeep and damage risk; toners fade fastest here |
One honest warning about black and very dark brown hair: it lifts warm. When dark pigment is lightened, it passes through red, then orange, then yellow. That is why dark hair highlights “turn orange” — the lightener stopped, or the toner faded, at the orange stage. A good colorist either stops at a warm tone that looks deliberate (copper, caramel) or lifts past orange and tones it cool (ash, mushroom). Problems happen in the middle: lifted to orange, toned weakly, then sent home. Ask directly: “Will my highlights be lifted past orange, or are we keeping them warm on purpose?” The answer tells you a lot about the plan.
First, choose your technique
Tone is what colour the highlights are. Technique is where and how they are placed — and technique controls your grow-out and your salon bill more than tone does. Here is the honest comparison.
| Technique | How it is done | Brightness | Grow-out | Typical salon time |
| Balayage | Hand-painted, mostly mid-lengths and ends, root stays dark | Soft to medium | Softest; 12–16+ weeks | 2–3 hours |
| Foil highlights (full) | Foils over the whole head, can start near the root | Brightest, most even | Visible line; 8–10 weeks | 2.5–3.5 hours |
| Foil highlights (partial) | Foils on top and around the face only | Bright where it shows most | 8–12 weeks | 1.5–2 hours |
| Babylights | Very fine foils, tiny sections, all over or partial | Subtle, natural, sparkly | Very soft; 10–14 weeks | 2–3 hours (slow, fine work) |
| Teasylights | Teased/backcombed sections, then foiled or painted | Soft brightness, no harsh lines | Very soft; 12–16 weeks | 2–3 hours |
| Foilayage | Painted like balayage, wrapped in foil for extra lift | Brighter than balayage, still blended | 10–14 weeks | 2–3 hours |
| Money piece | Bold lighter section framing the face only | High impact, small area | 6–10 weeks (it is at the front) | 30–60 minutes as an add-on |
If you are deciding between balayage and classic highlights: balayage keeps your root dark and melts lighter towards the ends, so regrowth is forgiving. Foil highlights can start closer to the root and look brighter and more uniform, but they show a regrowth line sooner. Neither is “better” — they are different contracts with your calendar.
Warm highlight ideas for dark hair
1. Caramel balayage on dark brown hair
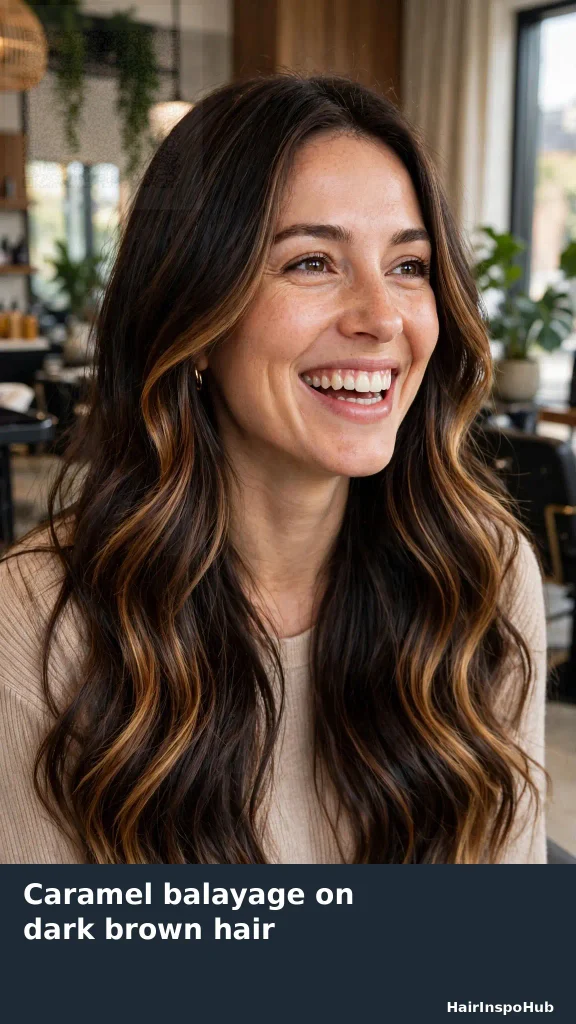
The look: Hand-painted caramel pieces melt through a dark chocolate base, brightest around the face and ends. This is the most requested warm look on dark hair, and the benchmark “before and after” photo most salons post.
Best for: Warm and neutral skin, medium to long hair, anyone who wants visible brightness without going blonde.
Ask your stylist: “Caramel balayage, two to three shades lighter than my base, brighter around my face, root left natural.”
Upkeep: Low. Gloss at 6 weeks, refresh at 12–16 weeks.
2. Honey highlights on long dark hair
The look: Golden honey ribbons woven through the lengths. On long hair the light moves when you do, which is why this looks so good in loose waves and curls.
Best for: Warm and olive skin, long hair worn wavy or curly, summer brightening.
Ask your stylist: “Honey highlights through the mid-lengths and ends, keep my root dark.” Bring a photo with hair the same length as yours — honey reads differently on short hair.
Upkeep: Low to medium. Honey fades warm, so brassiness is rarely a problem.
3. Golden toffee face frame (money piece)
The look: Two bright toffee sections at the front, soft highlights through the top only. The cheapest, fastest way to look “done” in every photo and video call.
Best for: Anyone whose current colour feels fine except dull around the face; first-timers.
Ask your stylist: “A toffee money piece, soft not stripy, plus a partial highlight on top.”
Upkeep: Medium. The front grows out visibly; refresh the face frame every 6–10 weeks, it is a short appointment.
4. Chestnut ribbons, one to two shades lighter
The look: The quiet option. Chestnut pieces just lift a deep brown base enough to show dimension in sunlight. Indoors it reads as rich, healthy brunette.
Best for: Conservative workplaces, colour beginners, anyone who has been scared off highlights by an orange experience.
Ask your stylist: “Chestnut highlights, only one to two shades lighter than my base, blended, no blonde.”
Upkeep: Lowest on this list. No harsh grow-out, minimal fading issues.
5. Copper ribbons on dark hair
The look: Metallic copper pieces catch light like sunset through the hair. Copper is the warm tone most likely to look expensive rather than accidental on a dark base, because it agrees with the warmth dark hair lifts to anyway.
Best for: Warm skin, autumn colour fans, dark hair that always turns orange — this makes that warmth the point.
Ask your stylist: “Copper balayage ribbons. I know copper fades fast; what gloss schedule do you suggest?”
Upkeep: Medium. Copper is the fastest-fading family here; plan a gloss every 4–6 weeks.
6. Cinnamon spice highlights
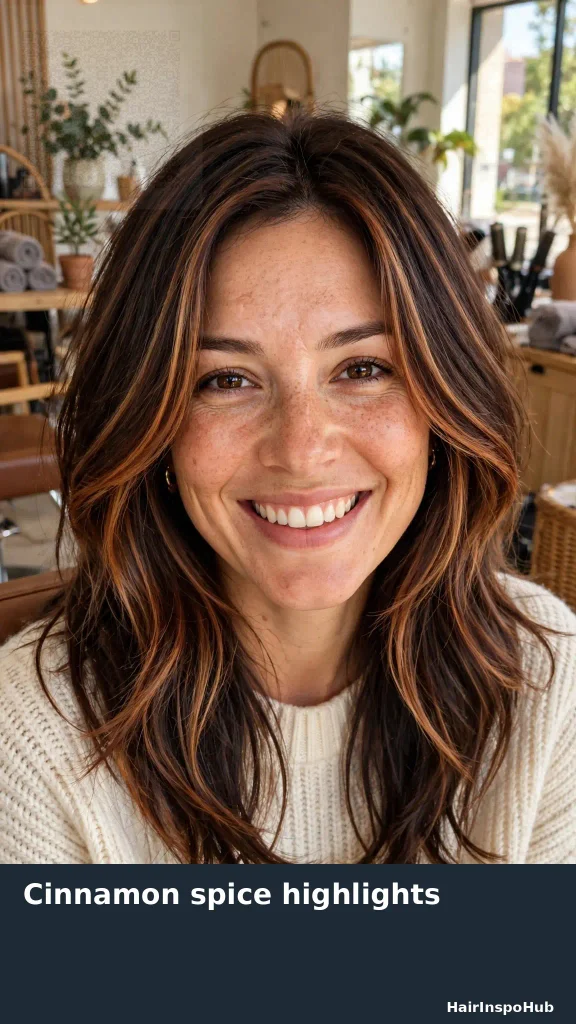
The look: Caramel and cinnamon painted piece by piece through dark brown — warmer than chestnut, softer than copper. Especially flattering in piece-y, face-framing placement.
Best for: Warm and neutral skin, layered cuts, medium-length hair.
Ask your stylist: “Cinnamon and caramel highlights, piece-y around the face, root melted.”
Upkeep: Low to medium. Soft grow-out; gloss twice between full appointments.
7. Cherry cola highlights on black hair
The look: Deep red-violet light glinting through a black or darkest-brown base. Indoors it looks like shine; in sun it flashes cherry. One of the few “colourful” options that stays office-safe.
Best for: Cool and neutral skin, black hair, anyone bored of brown tones.
Ask your stylist: “Cherry cola highlights on my natural black base, subtle indoors.” Ask whether your base needs any lift first — on black hair, usually a gentle one.
Upkeep: Medium. Red pigments fade fastest of all; cool water and colour-safe washing matter here.
8. Auburn-kissed ends
The look: The base stays dark brunette while the last few inches melt into auburn — warmth placed where it moves most. A good halfway step if you are curious about red but not ready for all-over auburn.
Best for: Warm and neutral skin, long hair, red-curious readers. If you love this family, our full dark auburn guide goes deeper on red shades.
Ask your stylist: “Keep my base, paint auburn through the ends with a soft melt, no hard line.”
Upkeep: Low to medium. Ends need the most moisture; trim and gloss keep them glossy.
Cool highlight ideas for dark hair
9. Mushroom brown highlights
The look: Ashy, grey-brown pieces over a deep base — the cool-toned answer to caramel. Mushroom tones neutralise warmth instead of fighting it, which is why they look so modern in flat, indoor light.
Best for: Cool and neutral skin, anyone whose hair pulls orange, grey-blending clients.
Ask your stylist: “Mushroom brown highlights, cool-toned, with an ash gloss.” Ask how many sessions your base needs — mushroom on very dark hair may take two visits.
Upkeep: Medium. Ash toners fade; a gloss every 4–6 weeks keeps it smoky, not khaki.
10. Smoky ash highlights on black hair
The look: Charcoal and silver-ash pieces blended through black hair. High fashion, deliberately cool, and the strongest grey-blending camouflage on this list because the highlights and the greys speak the same language.
Best for: Cool skin, black hair, early greys you want to blend rather than cover.
Ask your stylist: “Smoky ash highlights for grey blending, not full coverage. Patch test and strand test first, please.”
Upkeep: Medium to high. Needs purple shampoo discipline and regular glossing.
11. Icy beige money piece (high contrast)
The look: The bold front: near-blonde beige framing the face against a dark base, softer highlights behind it so the front reads as a choice, not a mistake. Maximum photo impact for minimum hair lightened.
Best for: Confident first-timers who want a visible change; short and medium hair where all-over blonde would overwhelm.
Ask your stylist: “Icy beige money piece, blended at the root so it does not grow out as a stripe.”
Upkeep: Medium. This is 5+ shades of lift in a small area — it needs toner upkeep and gentle handling.
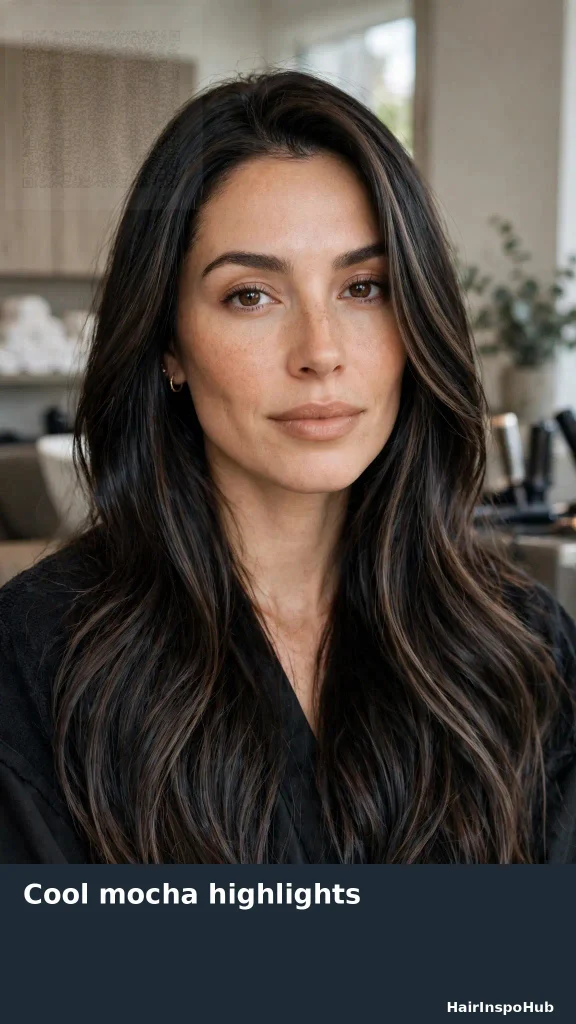
12. Cool mocha highlights
The look: Mocha sits between caramel and mushroom: earthy, muted, neither warm-gold nor grey. On dark hair it brightens without shouting, and it flatters the widest range of skin tones of any cool option.
Best for: Neutral and olive skin, office-friendly brightness, medium to long hair.
Ask your stylist: “Cool mocha highlights, two to three shades lighter, root shadow kept.”
Upkeep: Low to medium. Forgiving fade; gloss at 6–8 weeks.
13. Ash blonde babylights
The look: Hundreds of whisper-fine ash pieces, so the overall effect is “dark hair, but lighter and shinier” rather than visible streaks. This is how dark hair goes convincingly sun-lightened without a single obvious highlight.
Best for: Fine hair (babylights add the illusion of thickness), subtle-change seekers, grey blending.
Ask your stylist: “Ash blonde babylights, partial to start.” If you like the result, go fuller next time — babylights are easy to build on.
Upkeep: Medium. The pieces are fine, so grow-out is soft; tone upkeep is the main job.
14. Espresso and cool beige ribbons
The look: Your espresso base stays dominant while cool beige ribbons are painted sparsely through the top layers. Because the beige is cool, it reads as light, not gold — a good bridge for warm-skin readers who want to try the cool family.
Best for: Anyone transitioning from warm highlights to cool ones gradually.
Ask your stylist: “Keep espresso depth, add sparse cool beige ribbons on the top layers only.”
Upkeep: Medium. Two tone families in one head of hair means the gloss appointment really matters.
Technique-led ideas: placement that solves a problem
15. Babylights all over (the natural one)
The look: Full-head babylights are the “no one can tell, everyone notices” option. The sections are so fine that regrowth has nothing to line up against, which is why this doubles as the best grey-blending strategy on dark hair.
Best for: Fine or thin-looking hair, grey blending, maximum naturalness.
Ask your stylist: “Full babylights, one to three shades lighter, ash or caramel depending on my skin.” Book the longer appointment — fine sections take time.
Upkeep: Medium salon time, low visual upkeep. Gloss every 6 weeks.
16. Partial highlights (the budget smart one)
The look: Highlights only where eyes land: the top of the head and around the face. Underneath stays your natural dark, which adds depth for free and halves the cost and damage of a full head.
Best for: Thick hair (no one sees underneath anyway), budgets, maintaining brightness between full services.
Ask your stylist: “Partial highlights on top and face frame; leave the underneath natural.”
Upkeep: Low to medium. Alternate partial and full appointments through the year.
17. Full foil highlights (the brightest one)
The look: Foils over the whole head, starting close to the root. Nothing else gets dark hair this evenly bright in one visit. This is the look in most “dark to light brunette” transformations.
Best for: Anyone who wants unmistakable brightness and will keep 8–10 week appointments.
Ask your stylist: “Full foil highlights with a root shadow or melt so grow-out is softer.” The root shadow costs a little and buys you weeks.
Upkeep: Highest on this list. Budget time, money and bond care accordingly.
18. Teasylights (the lived-in one)
The look: Sections are teased before lightening, so the lightest pieces start at different heights and melt into the base. If visible regrowth lines are your personal nightmare, this is your technique.
Best for: Low-maintenance seekers who still want real brightness; long hair.
Ask your stylist: “Teasylights with a melted root, bright around the face.”
Upkeep: Low. Commonly 12–16 weeks between appointments, gloss in between.
19. Foilayage (bright but blended)
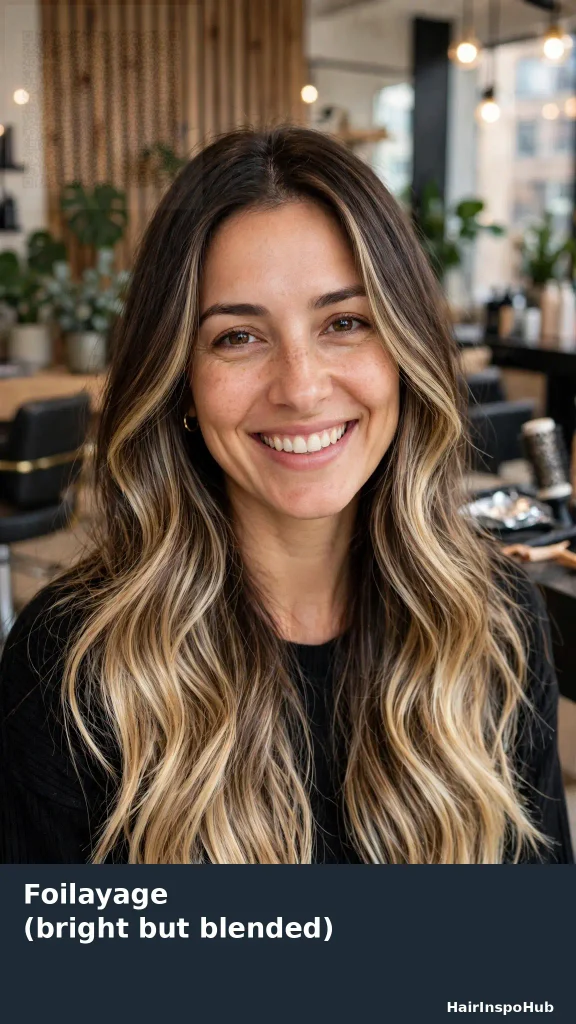
The look: Painted placement like balayage, foil-wrapped for the extra lift dark hair needs to reach lighter tones. Choose this when you love a balayage photo but your base is too dark for painting alone to get you there.
Best for: Dark brown and black hair wanting blonde-level brightness with a soft grow-out.
Ask your stylist: “Foilayage — I want balayage placement with foil lift so we actually reach the tone in my photo.”
Upkeep: Medium. Brighter result, still forgiving roots; gloss every 4–6 weeks.
20. Peekaboo highlights (hidden colour)
The look: Colour placed in the underlayers: invisible with hair down in a boardroom sense, flashing when hair moves, goes up, or catches wind. Copper, red, violet or blonde all work.
Best for: Anyone with a dress code, colour-curious beginners, updo fans (the colour appears in buns and ponytails).
Ask your stylist: “Peekaboo highlights in the underlayer only, [your colour], nothing on the top layer.”
Upkeep: Low to medium. Hidden placement means grow-out barely shows.
21. Chunky face-frame streaks (the bold front)
The look: Two deliberate, wider light streaks at the front — the Y2K-inspired frame, updated with a melted root so it grows out gracefully. Pairs well with an otherwise subtle partial highlight behind it.
Best for: Short to medium hair, curtain bangs and layered cuts, anyone who styles their front pieces daily.
Ask your stylist: “Two chunky face-frame pieces, blended at the root, softer highlights behind.”
Upkeep: Medium. Front placement = front grow-out; mini appointments keep it sharp.
22. Highlights with lowlights (restore the depth)
The look: If previous highlights have crept until your dark hair reads flat and light all over, the fix is not more highlights — it is lowlights: pieces darkened back to (or below) your base to rebuild contrast. Highlights plus lowlights together is how “expensive brunette” dimension is actually built.
Best for: Over-highlighted hair, hair that looks one flat colour in photos, anyone missing their dark depth. Our lowlights guide explains the dark side of this pairing in detail.
Ask your stylist: “I have lost my depth — can we add lowlights back in with my highlight refresh?”
Upkeep: Medium. Done alongside a normal highlight appointment; often the single biggest visible improvement.
23. Root melt and gloss (the grow-out fixer)
The look: Not a lightening service at all: a root melt blends your natural root into existing highlights while a gloss re-tones the lengths. Booked between lightening appointments, it stretches a highlight service from 8 weeks to 12+ and fixes brassiness in one visit.
Best for: Everyone with highlights, honestly. Essential for cool tones and copper.
Ask your stylist: “Root melt and gloss only today — no lightener.” Ask for this by name; it is cheaper and faster than a full refresh.
Upkeep: This IS the upkeep — 45–60 minutes every 4–8 weeks.
24. Curl-by-curl highlights for dark curly hair
The look: On curls, standard placement disappears or lands in the wrong place, because curly hair shrinks and stacks. Curl-by-curl painting places light on the curls that actually show — usually the outer canopy and face frame — so the highlights define the curl pattern instead of fighting it.
Best for: Curly and coily dark hair, anyone whose previous highlights “vanished” or looked spotty.
Ask your stylist: “Do you paint curl by curl, or use a technique designed for curls?” Choose a stylist who answers confidently; bring photos of highlighted curls at your curl pattern, not straight hair.
Upkeep: Low to medium. Curly hair is drier by nature, so moisture care outranks everything else here.
Choosing by your skin undertone (30-second test)
Check the veins on your inner wrist in daylight, or think about which jewellery you reach for. Greenish veins and gold jewellery flattering you usually means warm. Blue or purple veins and silver flattering you usually means cool. Both look fine, or you cannot tell? You are likely neutral — the luckiest group here, because almost everything works.
| Undertone | Reach for these tones | Be careful with |
| Warm | Caramel, honey, copper, cinnamon, golden toffee | Very ashy tones can look grey-green against warm skin |
| Cool | Mushroom, ash, smoky, icy beige, cherry cola | Strong gold can read orange or sallow |
| Neutral / olive | Cool mocha, chestnut, beige, toffee | Extremes at either end; muted mid-tones flatter most |
Choosing by hair length and texture
| Your hair | What works best | What to avoid |
| Short (bob, pixie-length) | Money piece, chunky face frame, partial highlights | Balayage — there is not enough length for a melt |
| Medium (lob to shoulders) | Partial or full highlights, teasylights, copper ribbons | Very fine babylights can disappear; ask for slightly bolder pieces |
| Long | Balayage, foilayage, honey/caramel through the ends | Full root-to-tip foils every visit — cost and damage add up; alternate with partials |
| Curly / coily | Curl-by-curl painting, honey, copper, mocha | Fine, evenly spaced foils that vanish into the curl pattern |
| Black (level 1–2) | Cherry cola, smoky ash, copper, foilayage for lighter tones | Expecting blonde in one gentle session — plan the lift honestly |
| Fine / thin-looking | Babylights and fine highlights add the illusion of depth | Very chunky pieces, which can make fine hair look stringier |
Two useful internal reads before you book: our brunette colour ideas guide covers all-over brunette shades if you are torn between highlights and a full colour change, and our blonde ideas for brunettes guide focuses on the lightest end of these options if you are tempted to go further than highlights.
What to say at the salon: 3 copy-paste scripts
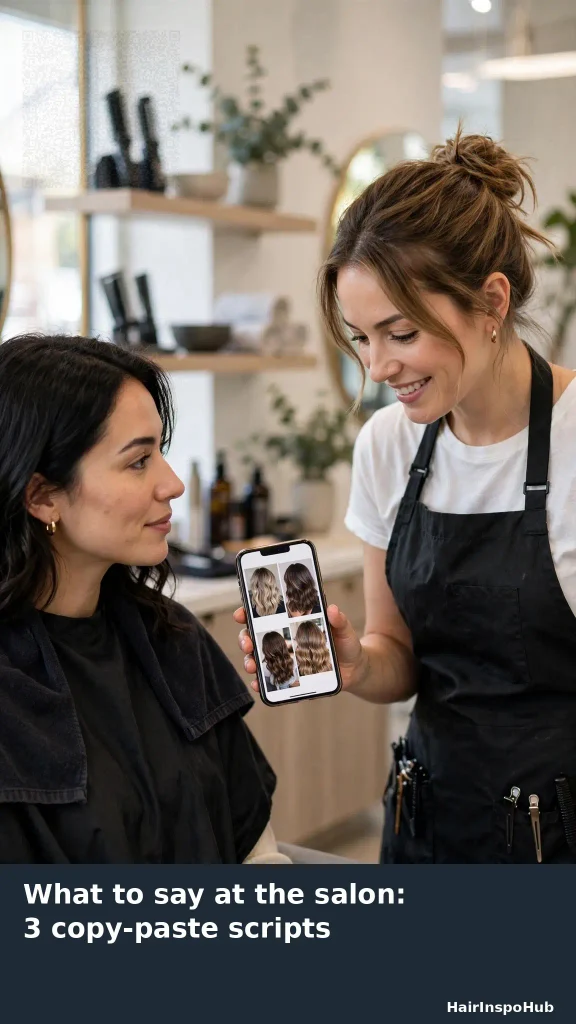
Bring two photos: one you love, one you would hate. The second photo prevents more disasters than the first creates successes.
- Subtle and safe: “I want to stay a brunette. Please add highlights one to two shades lighter than my base, blended, brighter around my face, and keep my root natural so it grows out softly.”
- Bright but low-maintenance: “I want visible brightness, but I can only come in three or four times a year. I was thinking foilayage or teasylights with a melted root. Does that fit my base and my photo?”
- Cool and smoky: “I want cool-toned highlights — mushroom or ash. I know dark hair lifts orange; please lift past that and tone it cool, and tell me honestly if we need two sessions.”
Before any lightener, a strand test and a patch test are the professional standard, especially on previously dyed dark hair. Previously coloured hair lifts unevenly and slower than virgin hair, and an honest stylist will say if your ends cannot take more lightener yet. That conversation is a sign of a good salon, not a sales tactic.
The maintenance clock: what you are actually signing up for
| Service | How often | What happens if you skip it |
| Gloss / toner refresh | Every 4–6 weeks | Warm tones fade fast; cool tones go khaki or brassy |
| Face frame / money piece refresh | Every 6–10 weeks | The front regrowth line shows first — a short, cheaper appointment |
| Partial highlights | Every 8–12 weeks | Top brightness dulls gradually; no hard line |
| Full highlights / babylights | Every 8–14 weeks | Visible root contrast, especially with 5+ shade lifts |
| Balayage / teasylights refresh | Every 12–16+ weeks | Very forgiving — this is the low-maintenance contract |
| Trim | Every 8–12 weeks | Lightened ends fray and tangle; highlights look worse on damaged ends than dark hair does |
Typical US salon ranges, for orientation only: a partial highlight often runs about $120–$250, a full highlight or balayage about $180–$400+, with big-city and specialist prices above that. A gloss-only visit is usually the cheapest appointment on this page. Always confirm the quote before the service starts, and ask whether toner and a bond treatment are included — on dark hair being lifted, they should be.
Keeping dark highlights rich at home
- Blue, not purple, for brunettes: purple shampoo is made for blonde and grey hair. On brunette highlights fighting orange tones, blue-pigment products are the correct colour-wheel opposite. Use once a week; more can dull the hair.
- Wash cooler and less often: hot water lifts toner fast. Lukewarm water, colour-safe shampoo, and stretching to two or three washes a week keeps both copper and ash alive weeks longer.
- Heat protection is non-negotiable: lightened hair is more heat-sensitive than your natural dark hair. Use a heat protectant every time, and keep hot tools below the highest settings.
- Bond and moisture care: lightening breaks bonds inside the hair. A weekly bond-repair or deep-conditioning treatment is what keeps highlighted dark hair shiny instead of straw-like; curly hair should weight this even more heavily.
- Sun and hard water fade colour too: UV lightens and warms highlights; mineral-heavy water deposits brassiness. A hat in strong sun and an occasional clarifying or chelating wash (followed by deep conditioning) quietly fixes “my toner died in two weeks.”
- Silk or satin at night: less friction means less breakage on lightened pieces, which are always the most fragile part of your hair.
5 mistakes that make dark hair highlights look cheap
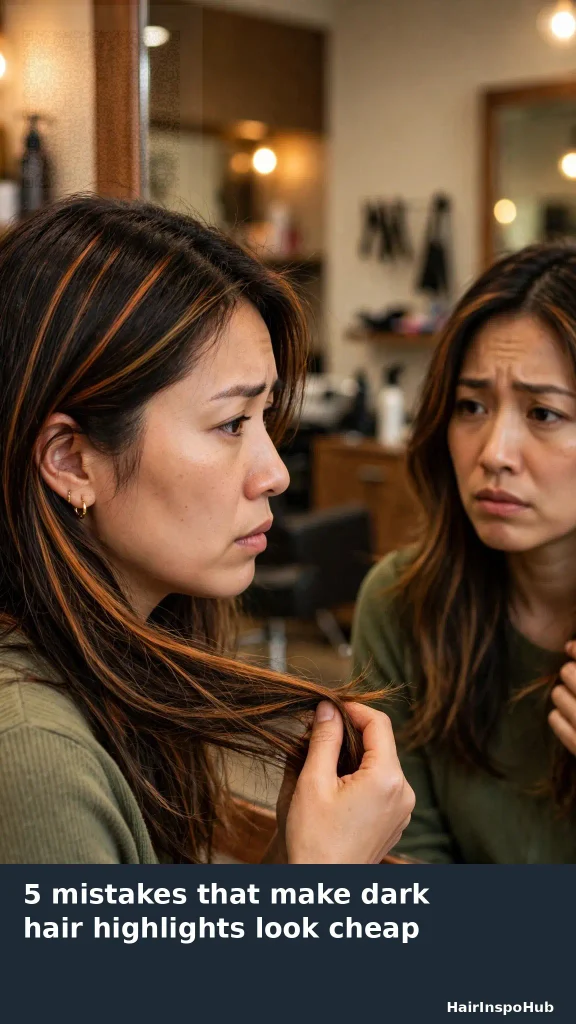
1. Going too light, too fast: lifting black or dark brown hair five shades in one aggressive session is how ends turn stretchy and highlights turn stripey-orange. Two gentler sessions beat one heroic one.
2. Choosing the tone, skipping the technique: a beautiful caramel in a root-to-tip foil pattern is a monthly-regrowth commitment. The same caramel in balayage is three visits a year. Pick the contract, not just the colour.
3. Highlights with no depth left: when everything is highlighted, nothing is. Keeping a dark base or adding lowlights is what makes the light pieces look bright.
4. Using purple shampoo on orange brunette hair: wrong pigment, disappointing result. Blue for orange, purple for yellow — match the product to the tone you are fighting.
5. Booking the lift, skipping the gloss: the gloss appointments are not upsells; toner is the actual colour you fell in love with in the photo, and it fades first. Skip them and every technique on this page drifts warm and dull.
The bottom line
Dark hair with highlights works best when you keep the thing that makes dark hair beautiful — depth — and add light only where it earns its place: around the face, through the moving lengths, in a tone your skin agrees with. Stay within three shades of your base for an easy life, book the gloss like you mean it, and choose the technique by how often you genuinely want to sit in a salon chair. Do that, and highlights stop being a maintenance trap and become the lowest-effort brightness upgrade dark hair can get.
Frequently asked questions
Can black hair get highlights without bleach?
Not lighter ones. Hair colour (tint) cannot lift hair lighter than it already is, especially on previously dyed hair; real lightening needs lightener. What you can do without lightener on virgin black hair is add a tone — a cherry, violet or deep copper cast that shows in sunlight. Anything visibly lighter than your base requires a lightening step, which is why a strand test matters.
Do highlights damage dark hair?
Lightening always costs the hair something — it opens the cuticle and removes pigment, and darker hair often needs more lift to reach lighter tones. The damage is manageable when the lift is gradual, a bond treatment is used during the service, and home care follows. It becomes a real problem with repeated full-head lightening, overlapping bleach on old ends, or five-shade jumps in one visit.
What is the difference between balayage and highlights?
Highlights usually mean foils: sections are woven, lightened in foil, and can start near the root for bright, even results with a clearer regrowth line. Balayage is hand-painted, concentrated through the mid-lengths and ends with a dark root, so it grows out softly and needs fewer appointments. Foilayage combines painted placement with foil lift.
How often do dark hair highlights need touching up?
It depends on technique and shade gap. Balayage and teasylights commonly go 12 to 16 weeks, partial highlights 8 to 12, and full foils 8 to 10, with a 30-to-60-minute gloss every 4 to 6 weeks in between to keep the tone right. High-contrast blonde on a dark base sits at the demanding end of every range.
Which highlights suit warm skin, and which suit cool skin?
Warm skin is flattered by caramel, honey, copper, cinnamon and golden toffee. Cool skin suits mushroom, ash, smoky and icy beige tones, plus cool reds like cherry cola. Neutral and olive skin does best in the muted middle: cool mocha, chestnut and beige. If a tone fights your skin, the gloss can usually shift it warm or cool at the next visit.
How do I stop my highlights turning orange?
Orange appears because dark hair lifts through orange and the toner fades. Prevention is threefold: lift far enough in the salon (or choose a deliberately warm tone like copper), refresh the toner with a gloss every 4 to 6 weeks, and use a blue-pigment shampoo weekly at home. Cool water and less frequent washing slow the fade noticeably.
Are highlights good for blending grey hair?
Yes — on dark hair, fine highlights (babylights) in ash, mushroom or beige tones are one of the softest grey-blending strategies. The light pieces disguise incoming greys, there is no solid regrowth line like all-over dye, and you trade full coverage for a much gentler appointment schedule of glosses and partial refreshes.
Can I highlight dark hair at home?
A face-frame or a few top pieces with a home kit is possible for experienced hands, but dark hair is the least forgiving starting point: under-lifted sections turn orange, and correcting that costs more than the original salon visit. If you try it, do a strand test first, stay within two shades of your base, and follow the patch-test instructions on the product without exception.

Stella Mary is a US-based hair care enthusiast and lifestyle writer at HairInspoHub, sharing trend-forward hairstyle tutorials, styling tips, and healthy hair rituals for women of every hair type. Specializing in Pinterest-inspired looks from bridal updos and effortless braids to heatless waves and sleek ponytails. She blends timeless elegance with everyday practicality. Her mission making gorgeous, confidence-boosting hairstyles accessible to everyone, one tutorial at a time.
One Comment